A hearing report template lets you decide what your clinicians record on a hearing test, and exactly how that information prints on the report. You choose the fields, then lay them out on the page alongside the audiogram, your logo, headings and any fixed wording. A template can be used on hearing tests created in HearLink and on hearing tests imported from Noah.
Only users with the correct permissions can manage hearing report templates. If you think you should have permission to perform such an action please contact the organisation owner.- Every template includes an Audiogram. It is added for you and cannot be removed, but you choose where it sits on the page.
- Building a template has two steps: the Components step, where you decide what is recorded, and the PDF designer, where you decide how it looks.
- The designer needs a desktop or laptop screen. It is not available on a phone.
- A selection of default templates are available to be used, edited or as guides when creating your own.
In this article we'll cover how to:
- create a hearing report template.
- add the fields your clinicians complete.
- build a table field.
- lay the report out in the designer.
- work with pages, and what to do when a block will not fit.
- change the look of a block.
- add fixed text, images and your logo.
- set up the header, footer, margins and page numbers.
- make sure everything fits on the page.
- choose a default template.
- duplicate, edit and delete a template.
Create a hearing report template
- Navigate to Organisation settings.
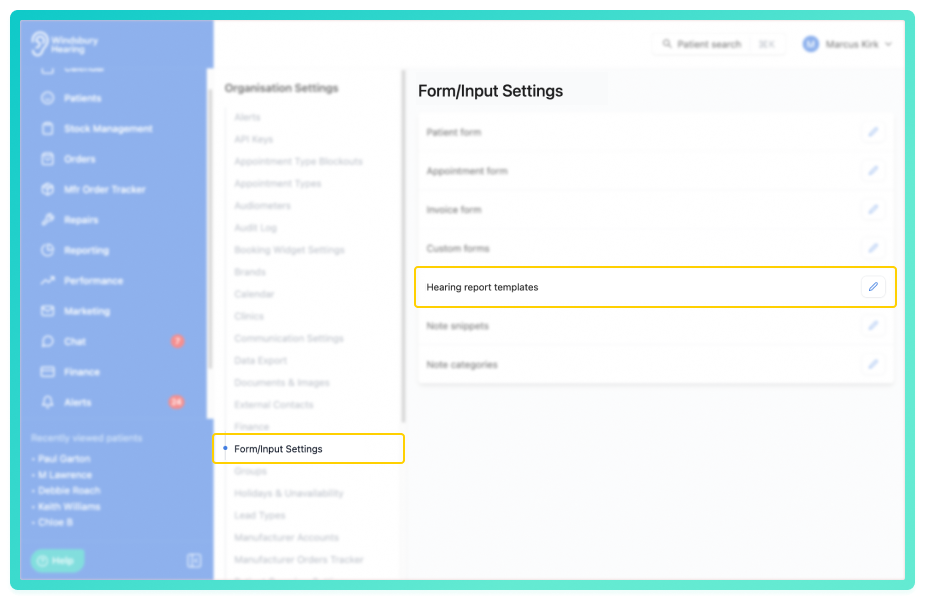
- Locate and click the Form/Input Settings section.
- Click the Edit
 icon on Hearing report templates.
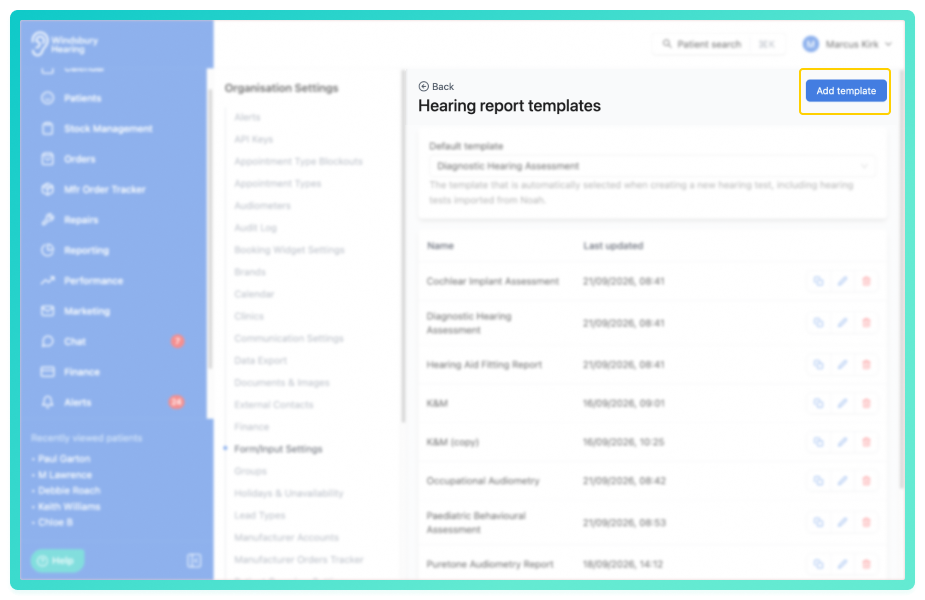
- Locate and click Add template.
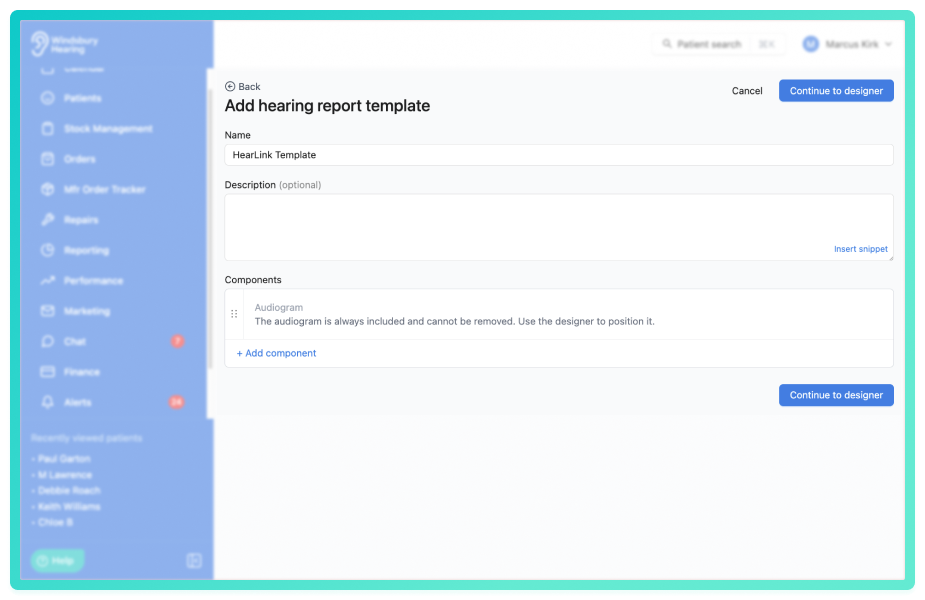
- Give the template a Name. This is what your clinicians choose from when they create a hearing test, so make it recognisable. Adult assessment, Occupational audiometry, Paediatric review.
- Add a Description if it helps your team pick the right one.
- Add your components, then click Continue to designer. You need at least one component before you can continue.
Add the fields your clinicians complete
Components are the pieces of information recorded on the hearing test. Each one becomes a block you can place on the report.
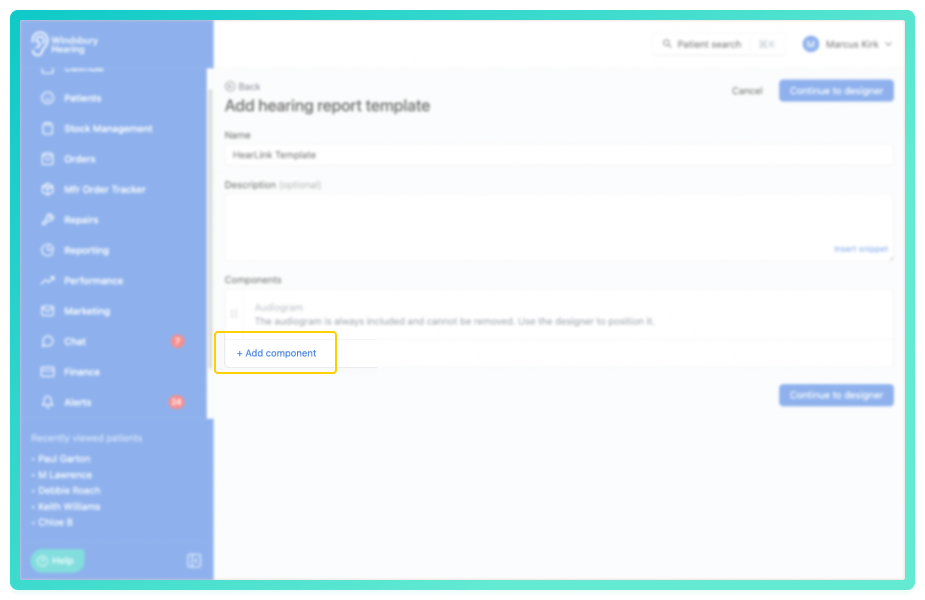
- On the Components step, click + Add component.
- Choose a Type:
- Field - something the clinician fills in.
- Image picker - lets the clinician choose one of the patient's images, or upload a new one, and prints it on the report. An otoscopy image.
- Audiogram - already included in every template.
- For a Field, enter a Label. The label prints on the report above or beside the answer.
- Choose a Control type: Text field, Number field, Checkbox group, Date picker, Text area, Signature, Radio button or Table.
- For a Checkbox group or Radio button, add your Options - type each option and press Enter to add it. These print as boxes with a tick against the ones chosen.
- Turn on Required if the clinician must complete it before the hearing test can be saved.
- Click Submit to save the component, then repeat for everything else you want recorded.
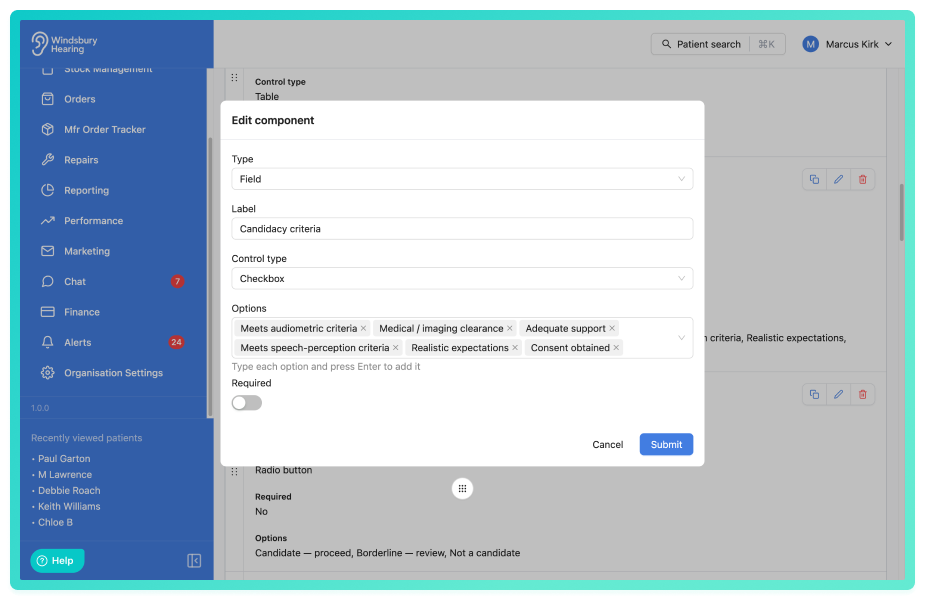
 Tip: Keep labels short. A label prints on a single line, so a long one is shortened with an ellipsis rather than wrapping.
Build a table field
A table is useful when the same set of answers is recorded for several items, such as each ear or each frequency. You define the table once and it is used on the hearing test form and on the report.
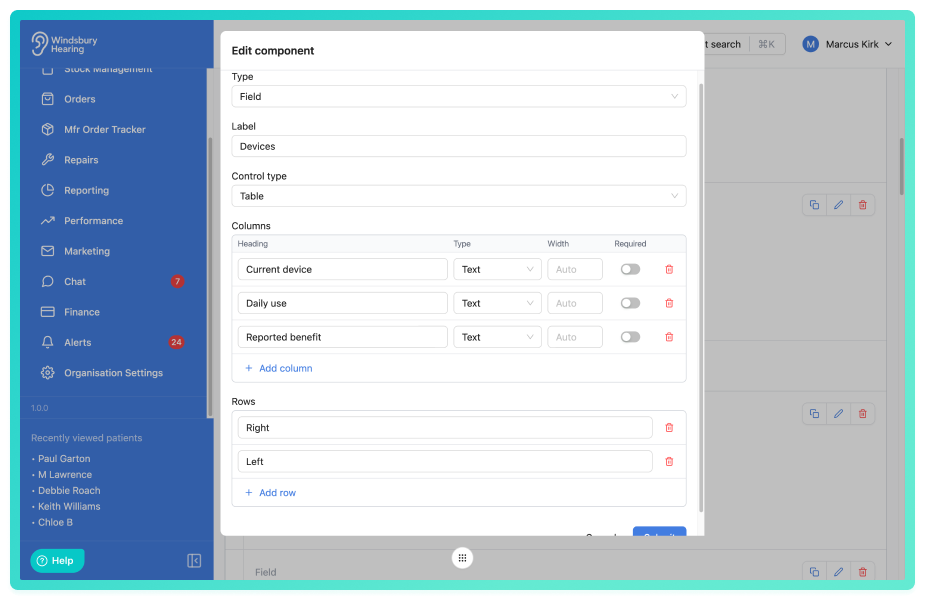
- Choose Table as the control type. The table builder appears below.
- Under Columns, click Add column and give it a Heading.
- Choose the column Type: Text, Number or Tick box.
- Set a Width, or leave it as Auto. Width is a share of the table rather than a fixed measurement, so a column set to 3 is three times as wide as one set to 1. Widths hold however big or small you make the table on the page.
- Tick Required on a column that needs a value in every row.
- Under Rows, click Add row. A Row label is optional - add one when each row is a fixed item. Left ear, Right ear.
Lay the report out in the designer
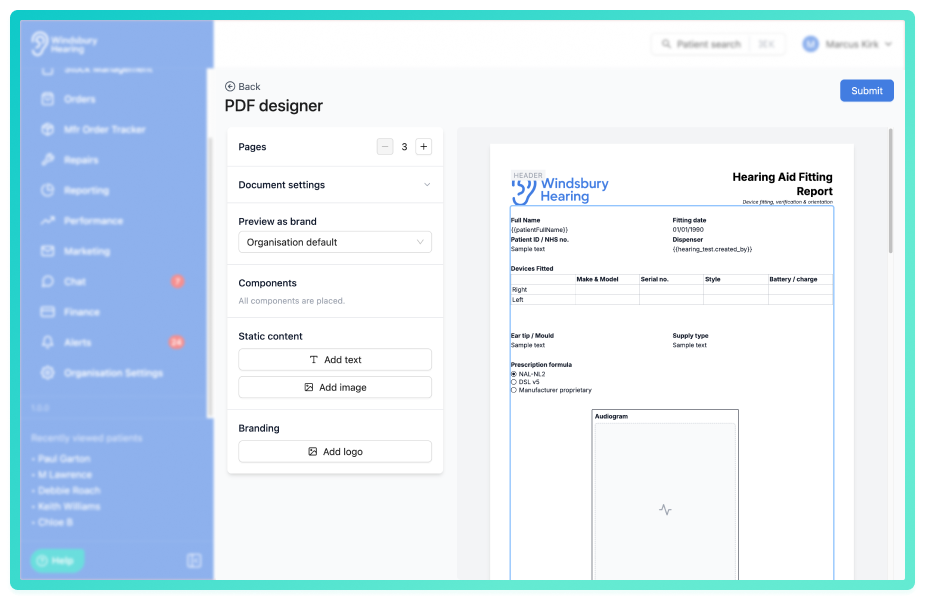
The designer shows the report at actual size. What you see on screen is what prints.
- Components you have not placed yet are listed under Components on the right, with a count of how many are left. Click one to add it to the page - it is placed in the first free space, ready for you to move.
- Drag a block to move it. Drag its edge or corner to resize it.
- Blocks snap to a grid and cannot overlap, so a block only grows into space that is free.
- The Audiogram keeps its shape. Resize it from any edge and the other side follows, so it always prints in proportion.
- When you are happy, click Submit to save the template.
Working with pages
Blocks never overlap, and a block never moves onto the next page by itself, so a page fills up. These are the things to know when it does.
- A block is added to the area you last worked in - a page, or the Header or Footer band. Click the page you want first, or the block may not appear where you expect.
- If there is not enough free space, HearLink shows Not enough space here for this block and nothing is added. Free some space, make another block smaller, or add a page.
- Use the Pages control to add a page. The new page becomes the one you are working in, so the next block you add lands on it.
- To move a block, select it and choose a page under Move to page. This appears once you have more than one page, and only for blocks on a page - blocks in the header or footer cannot be moved this way.
- A moved block goes into the first free space on the page you send it to, not the position it had before. If that page is full, the move is refused and the block stays where it is.
- You can only remove the last page, and only once it is empty. Move or delete its blocks first.
- When you resize a block it stops at its neighbour. If a drag would make two blocks overlap, the block snaps back to the size it was.
 Good to know: Because nothing reflows on its own, it is quicker to place your biggest blocks first - the audiogram, any tables, and the header and footer - and fit the smaller fields around them afterwards.
Change the look of a block
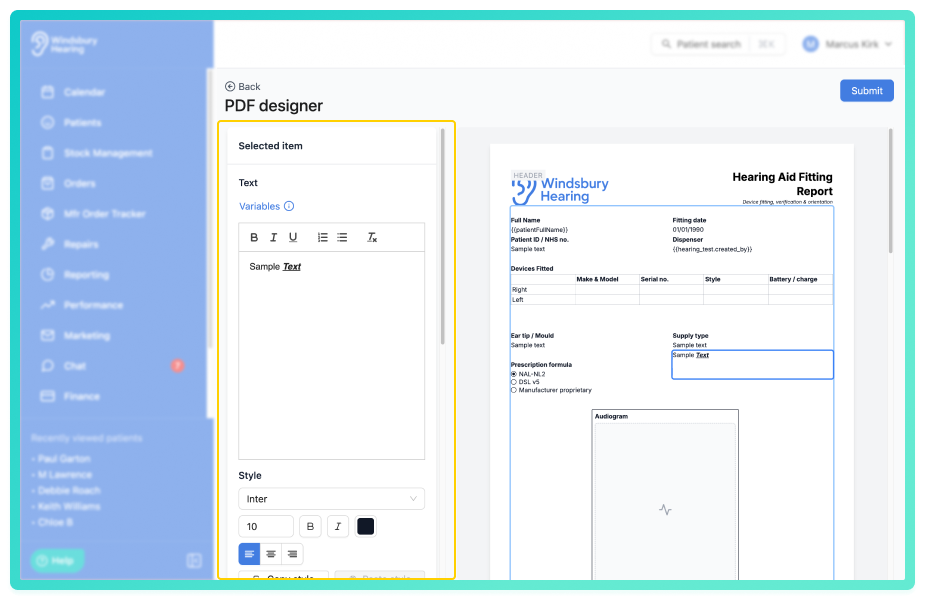
- Click a block to select it. Its settings appear under Selected item.
- Set the font, size in points, bold, italic, colour and alignment. The Label and the Value are styled separately, so you can make a heading stand out from the answer beneath it.
- Under Border, choose the width, the colour and which sides are drawn. Turning on a single side is a tidy way to add a rule between sections without using up space.
- Click Copy style on a block you have finished, then select another block and click Paste style to apply the same formatting.
Add fixed text, images and your logo
Fixed content is the same on every report produced from the template - headings, clinic details, standard wording, a signature strip or a logo.
- Under Static content, click Add text or Add image. Under Branding, click Add logo.
- Select a text block and type into the panel. You can use bold, italic, underline and numbered or bulleted lists. Font, size, colour and alignment are set in the block's style settings.
- Insert a variable to pull in live information instead of typing it. Variables are available for the patient, the clinic, your organisation, the hearing test and general details such as today's date.
- Hearing test variables include the audiologist, the test date, who created the test and their job title, and the audiometer's make, model, serial number and calibration date.
- For an image block, click Upload image, or Replace image to swap one you have already added.
- Choose an Image fit - Fit inside keeps the whole image visible, Fill and crop fills the block and trims the overlap, and Stretch distorts the image to fit exactly. Then set its Position within the block.
- A logo block uses your organisation's logo. If you run more than one brand, use Preview as brand to check how the layout looks with each brand's logo in place.
Set up the header, footer, margins and page numbers
- Expand Document settings in the panel on the right.
- Give the Header or Footer a Height to create the band, then place blocks inside it. Whatever you put there repeats on every page.
- Turn on Page number to print the page number and total at the foot of each page.
- Set the Margins (mm) for the Top, Right, Bottom and Left edges. Check what your printer or letterhead needs.
 Reminder: Margins change the size of every row and column on the page, so blocks move when you change them. Set your margins before you spend time on fine positioning.
Make sure everything fits on the page
The designer is a true preview - a block is the same size on screen as it is on the printed report. The only thing that changes at print time is what happens when a clinician writes more than the block holds.
- Text prints at 10pt unless you set a size on the block. You can set any size between 6pt and 48pt.
- If an answer is longer than the space set aside for it, HearLink shrinks the text in small steps until it fits. It will not shrink below 6pt. An answer that still does not fit at 6pt is cut off at the bottom, and the rest of it does not print.
- Shrinking applies to the whole block, so every line in it gets smaller together. A block that is usually comfortable can print small on the one report where a clinician has written at length.
- When a clinician records a hearing test, a warning appears under any answer that is too long: This is longer than the space set aside for it on the report, so the end may be cut off.
- Only the answer shrinks - a Label always keeps the size you set, so a heading never shrinks to make room for a long answer. A label too wide for its block is shortened with an ellipsis instead, in the designer and on the report alike. If you see a label cut short on screen, widen the block or shorten the label.
- Give a block that holds a written answer a little more height than looks necessary. A very short block leaves no room for the answer once the label has taken its line.
 Warning: Table cells behave differently. Text that is too long for a cell is cut off rather than made smaller, and no warning is shown. Give table columns enough width for the answers you expect.
Choose a default template
- Go to Hearing report templates.
- Use the Default template selector above the list.
- The template you choose is selected automatically whenever a new hearing test is created, including hearing tests imported from Noah. A clinician can still change it on the test.
- Choose None if you would rather tests start on the standard hearing test form.
Duplicate, edit and delete a template
Duplicate a template
- Click the Duplicate action on the row you want to copy.
- A new template opens, named after the original with (copy) on the end. Rename it, make your changes and click Submit in the designer.
- Nothing is saved, and the original is not touched, until you submit.
Edit a template
- Click the Edit icon on the row.
- Change the components, then click Continue to designer to reposition anything new.
- Reports that have already been produced do not change. Your edits apply the next time a hearing test using this template is saved.
Delete a template
- Click the Delete icon
 on the row and confirm.
 - The template is removed from the list and can no longer be chosen on a hearing test.
- Everything your clinicians have already recorded on existing hearing tests is kept.
Warning: If a hearing test that used a deleted template is saved again, its report is produced using the standard hearing test report instead of your layout. Duplicate a template you may want back before deleting it.Was this article helpful?
That’s Great!
Thank you for your feedback
Sorry! We couldn't be helpful
Thank you for your feedback
Feedback sent
We appreciate your effort and will try to fix the article