Appointment outcomes are labels that can be applied once an appointment is completed. These outcomes can be triggered by workflow statuses and can be useful for tracking appointment progress and analysing data in the Reporting hub.
In this article we'll cover how to:
- add an outcome.
- set an outcome to trigger on a status change.
- edit an outcome.
- remove an outcome
To learn more about how outcomes work with statuses, see how to use outcomes.Add an outcome
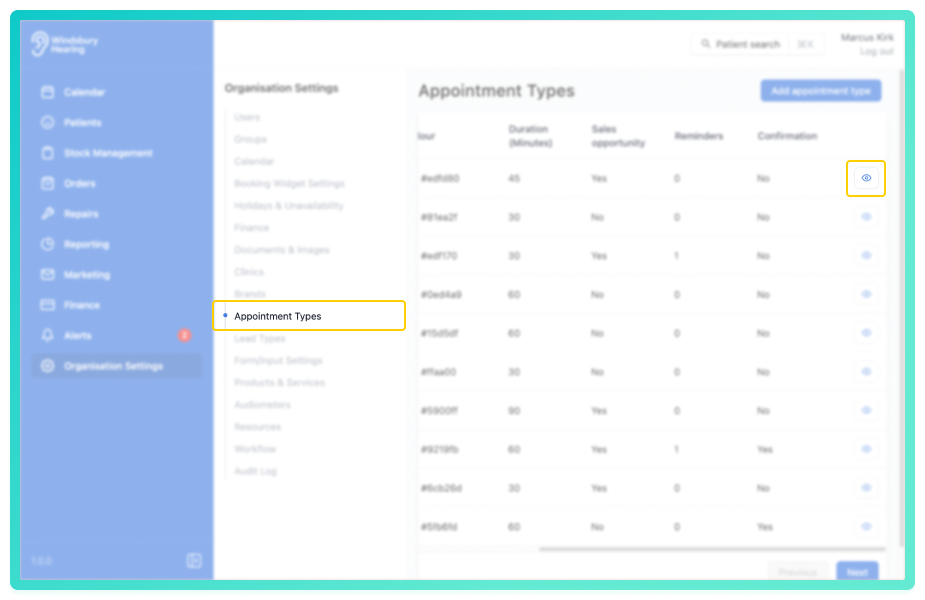
- Navigate to Organisation settings.
- Locate and click the Appointment Types section of the settings.
- Click the View icon
 of the appointment type you want to add outcomes to.
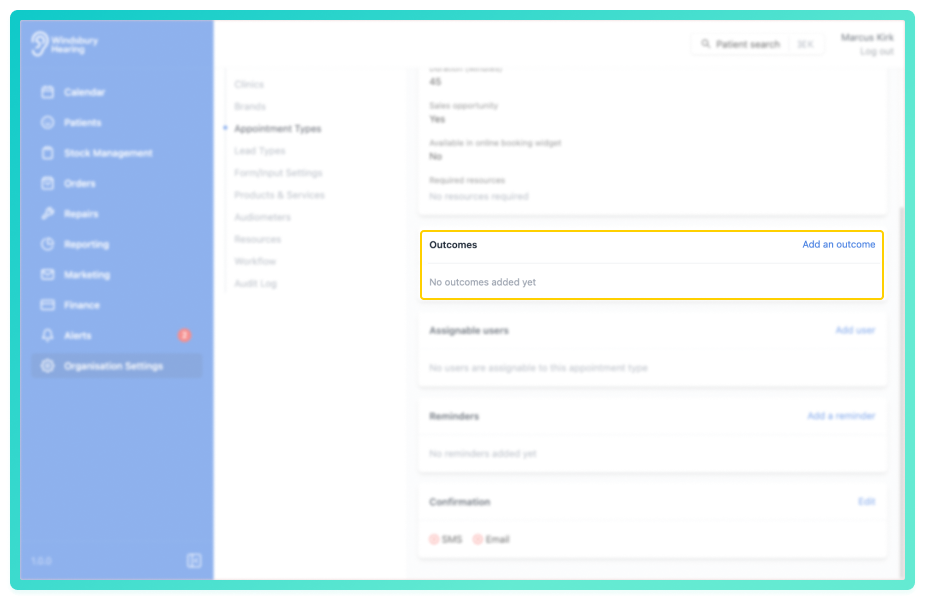
- Locate the Outcomes section.
- Click the Add an outcome button.
- Add a Banner label and Colour.
- Select any Statuses that will trigger this outcome automatically.
- Select if a note is required or not when setting an outcome.
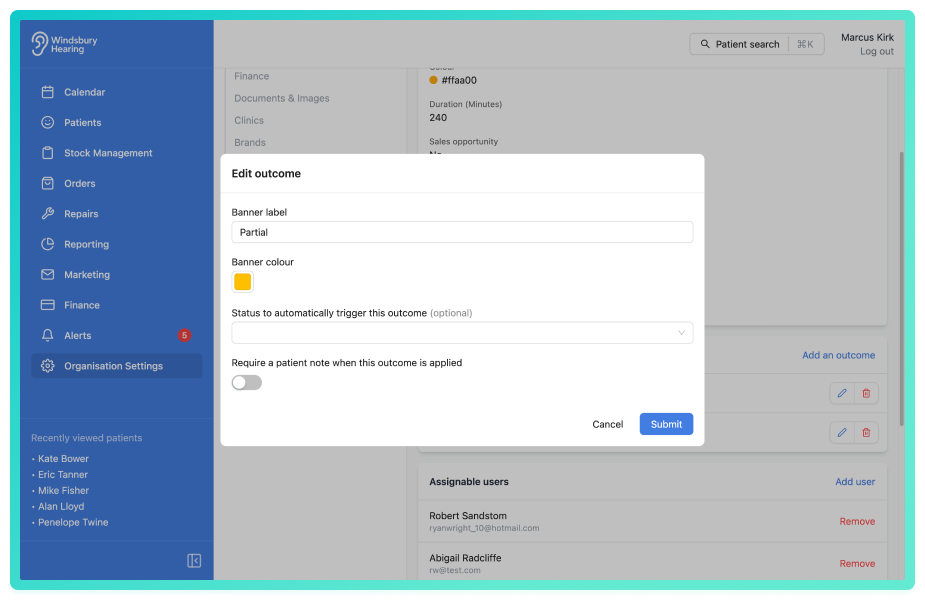
Note on statuses and outcomes: If a status is changed before the start time of an appointment or 48 hours after the end time of an appointment, the outcome will not be applied to the appointment on status change.Edit an outcome
- Locate and click the Edit text on the Outcome you want to modify.

- Update the Outcome as required.
- Click Submit to save your changes.
Remove an outcome
- Locate and click the Remove text on the Outcome you want to remove.
- You'll be shown a warning message.
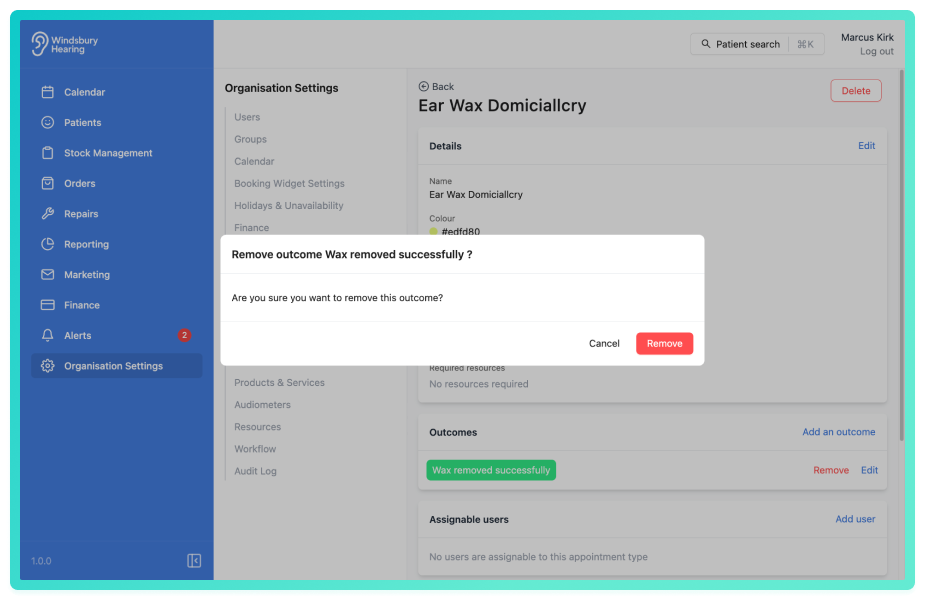
- Click Remove to confirm and remove the outcome.
Was this article helpful?
That’s Great!
Thank you for your feedback
Sorry! We couldn't be helpful
Thank you for your feedback
Feedback sent
We appreciate your effort and will try to fix the article