You can automatically send confirmation messages to patients when an appointment is booked, via email or SMS. The content of these message are set with email and SMS templates and can be selected for each appointment.
In this article we will cover how to:
- enable or disable patient confirmations.
- add a template to each appointment type.
- configure confirmation content and preview messages.
Only users with the correct permissions can set patient confirmations. If you think you should have permission to perform such an action please contact the organisation owner.Enable or disable patient confirmations
- Navigate to Organisation Settings.
- Locate and click the Appointment Types section of the settings.
- Click the View icon
 on the appointment type you want to update.

- Locate the Confirmations section.
- Click the Edit text.
By default the email and SMS confirmations will be disabled.
- Use the checkboxes to enable or disable Email and/or SMS confirmations.
- When enabled, select the required template from the dropdown list.
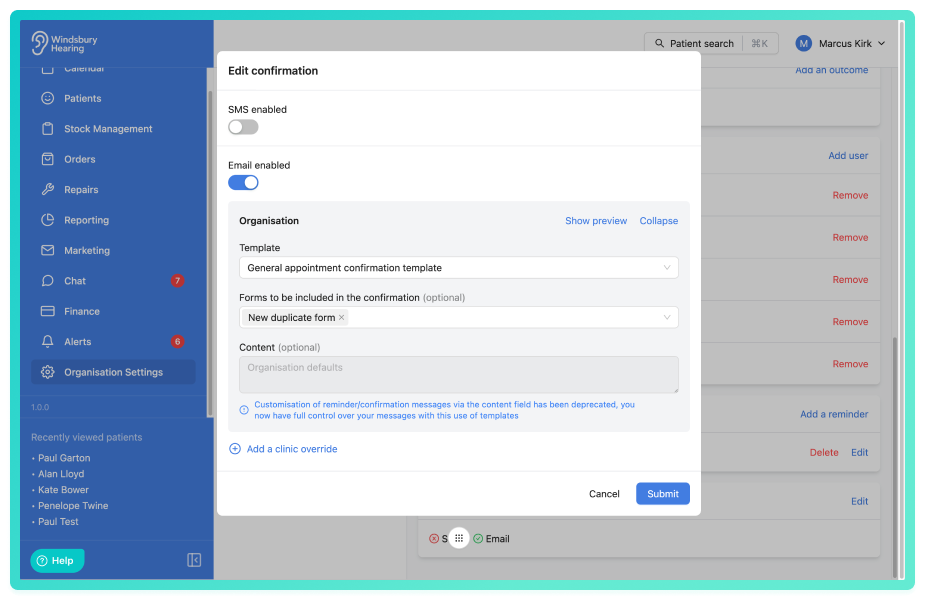
- If needed, include a form for the patient to complete before their appointment (learn more about forms).
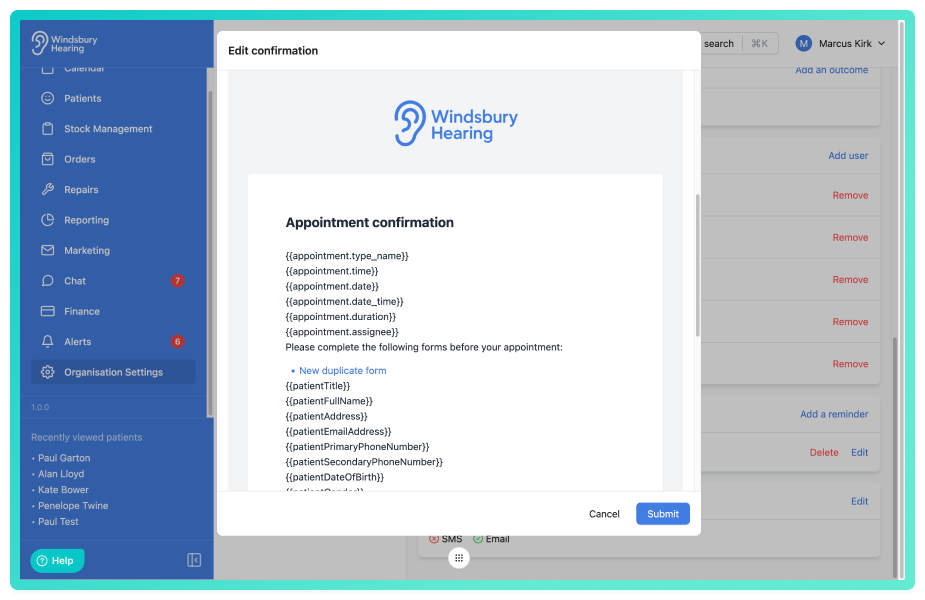
- Click Show preview to see how the confirmation message will appear.
- Click Submit to save your changes.
On sending of the confirmation the variables will be replaced automatically with the appointment and patient information.Once saved, the confirmation status will display as:
- Enabled -

- Disabled -

You can enable both Email and SMS confirmations if required.

Was this article helpful?
That’s Great!
Thank you for your feedback
Sorry! We couldn't be helpful
Thank you for your feedback
Feedback sent
We appreciate your effort and will try to fix the article