Repair statuses help your organisation track the progress of device repairs. You can control which default statuses are available and create custom statuses to match your repair workflow.
Only users with the correct permissions can configure repair statuses. If you think you should have permission to perform such an action please contact the organisation owner.In this article we'll cover how to:
- manage available repair statuses.
- edit or delete a custom order status.
- using manufacturer order statuses.
Manage available repair statuses
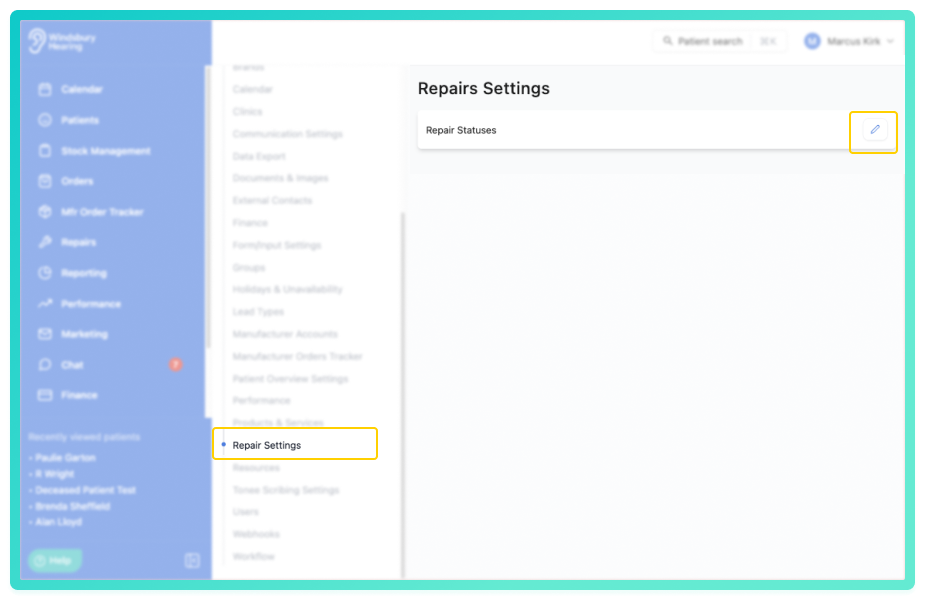
- Navigate to Organisation settings.
- Locate and click the Repair Settings section.
- Click the Edit
 icon next to Statuses.
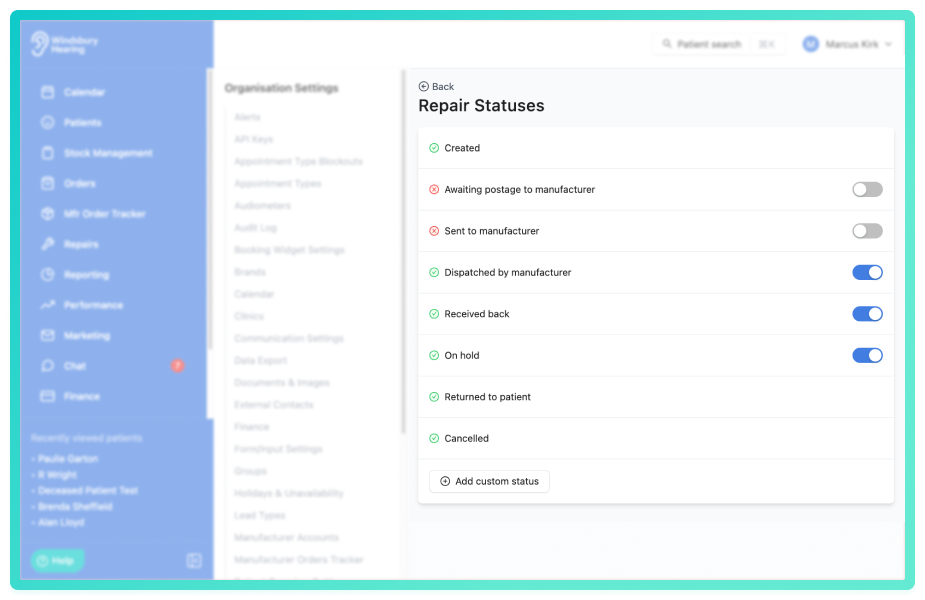
- Enable or disable statuses, this controls whether users can select them. Some statuses cannot be disabled as these are terminal and have actions when selected.
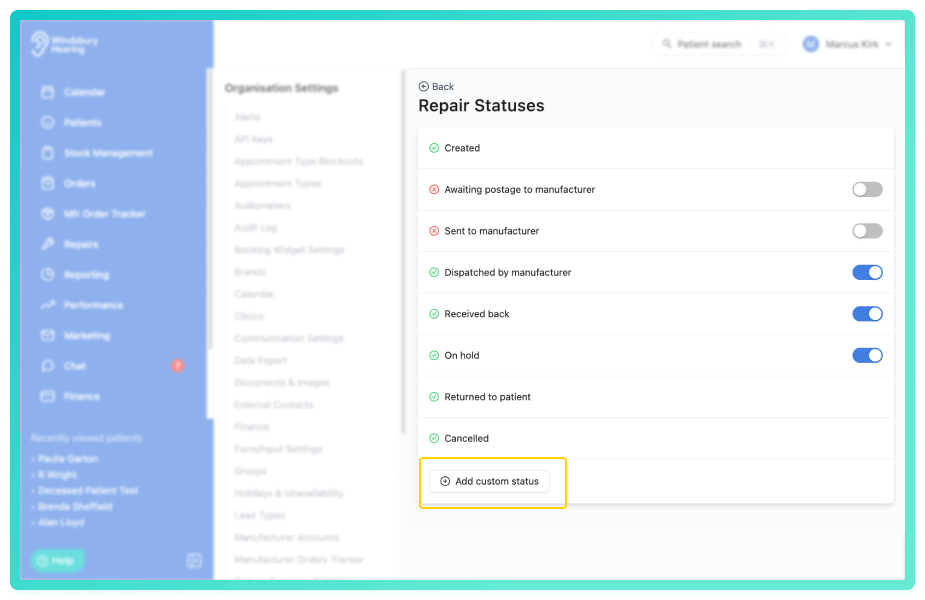
To add a custom status:
- Click the Add custom status button.
- Complete the status form with Name, Colour and optional Text colour.
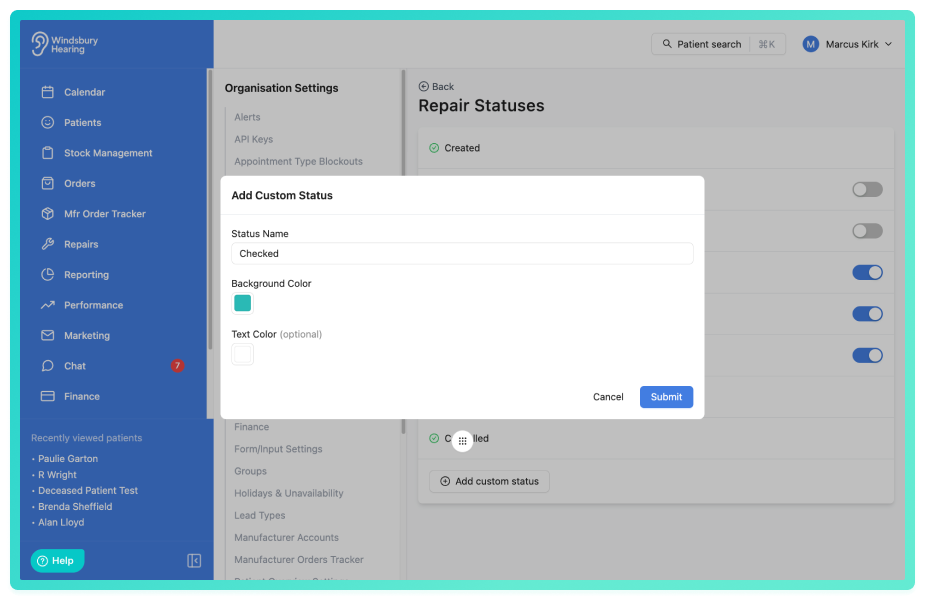
Custom statuses behave the same way as system statuses and appear in the repair status list when creating or updating repairs.
Edit or delete a custom status
- Locate the custom status you want to edit or delete.
- Editing: Click the Editicon, make the required changes and click Submit.
- Delete: Click the Delete
 icon, follow the prompt and delete the status.
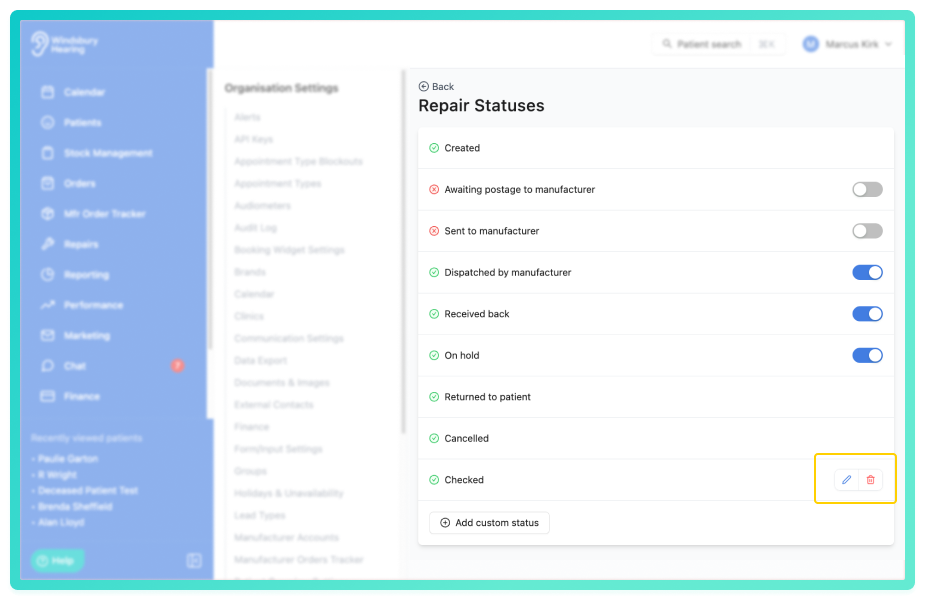
Deleting a custom status does not affect repairs that were previously in that status, they retain the status name for historical reference.
Warning: Once a custom status has been deleted, this action cannot be undone. Please proceed with caution.Using repair statuses
Once your statuses are configured, users can:
- Update repair status from the patient's Repairs tab.
- Filter repairs by status in the Repairs dashboard.
Further reading: Repairs Overview.
Was this article helpful?
That’s Great!
Thank you for your feedback
Sorry! We couldn't be helpful
Thank you for your feedback
Feedback sent
We appreciate your effort and will try to fix the article