Appointment statuses help your organisation track what has happened with an appointment directly from the calendar. These statuses act as quick visual indicators and support workflows and communication between staff.
You can control which default statuses are available and create your own custom statuses.
When marking an appointment as rescheduled, a user can add a note to be added to the patient's profile. This is optional as default but can be set to be required in the calendar settings.In this article we'll cover how to:
- manage available appointment statuses.
- update an appointment status.
- understand key status behaviours.
- remove a status.
Manage available appointment statuses
- Navigate to Organisation settings.
- Locate and click the Calendar section.
- Click the Edit
 icon next to Appointment Statuses.

- Enable or disable statuses, this controls whether users can select them.

To add a custom status:
- Click the Add custom status button.

- Complete the status form with Name, Abbreviation and Colour.

Custom statuses behave the same way as system statuses and appear in the appointment status list.
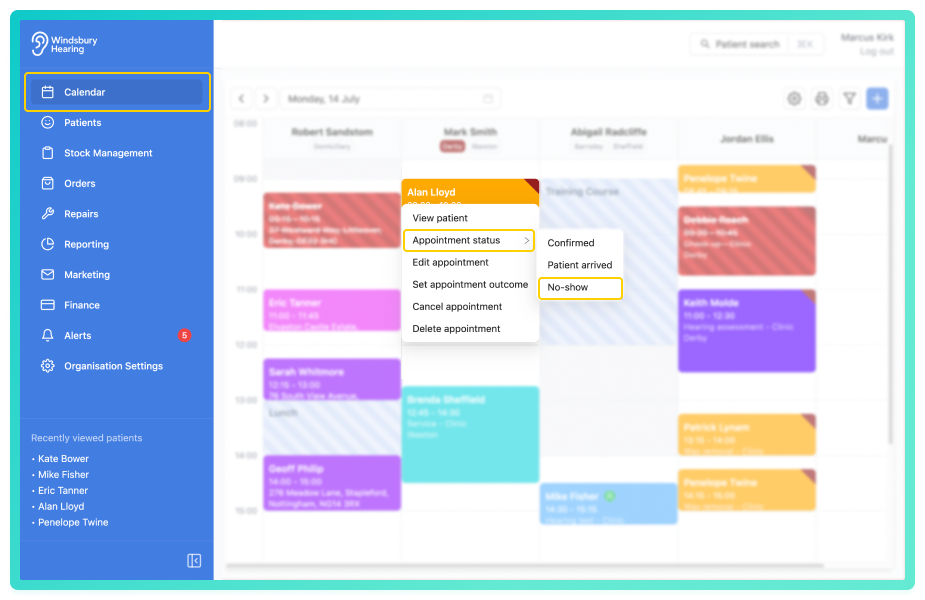
Update an appointment status
Statuses are updated directly from the calendar or the patient record.
- Navigate to Calendar.
- Locate the required appointment and click More options
 .
. - Select Appointment status text.
- Choose the required status.
- Confirm the change.

- The status indicator will update on the appointment card.
Key status behaviours
Some statuses have additional behaviour:
Patient arrived
- Triggers a notification to the assigned user that their patient has arrived.

Rescheduled
- You can add a note when marking an appointment as rescheduled.
- This note is added to the patient record.
- The note can be made required in the Calendar settings.
- Rescheduled appointments show with slightly reduced background opacity on the calendar.

Removing a status
- Locate the required appointment, then click More options.
- Click the Appointment status text.
- Select the option that you want to remove.
- Confirm you want to remove the status.
Was this article helpful?
That’s Great!
Thank you for your feedback
Sorry! We couldn't be helpful
Thank you for your feedback
Feedback sent
We appreciate your effort and will try to fix the article