Alerts are used at a users discretion. Example: A patient may require a phone call 24 hours before their appointment, an alert can be set up on the required day as a reminder.
To learn how to create an alert for a patient, please see this article.
In this article we'll give an overview of the alerts section, filtering alerts and how to acknowledge an alert.
Alerts view
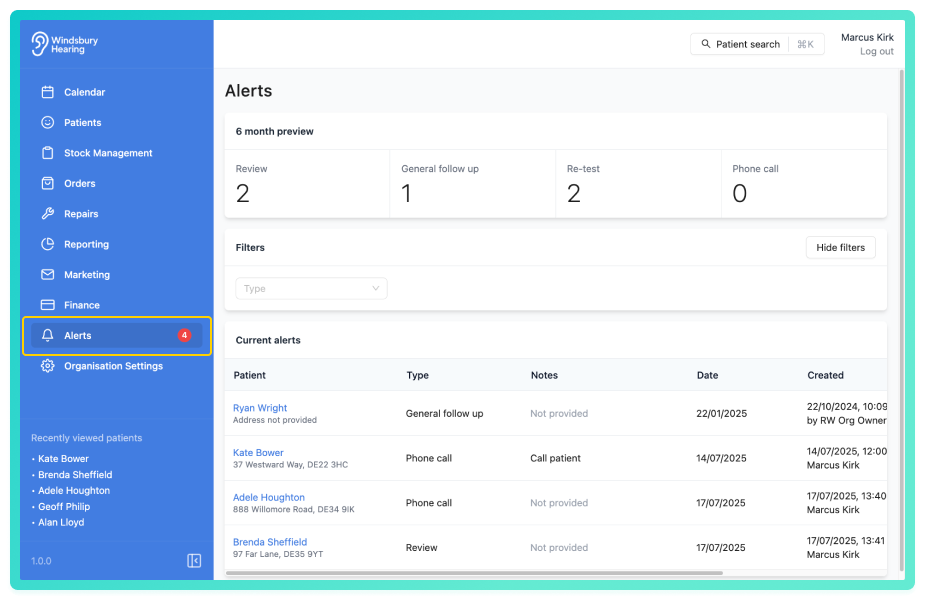
You'll see a list of past and current Alerts. There are 4 types of pre-defined alerts:
- Review
- General follow up
- Re-test
- Phone call.
You can also add custom alert types. For more information see, Alert types.
Use the filter option to view alerts by any of the particular types.
Alerts will appear on the day they are set. This date is configured when creating an alert for a patient.Filtering alerts
Use the filters at the top of the alerts list to narrow down which alerts you see:
- Date range - Select your required date range to view alerts from a specified period.
- Type - Select an alert type to view only that type of alert (Review, General follow up, Re-test, Phone call or custom types).
- Assignee - Select a user to view only alerts assigned to them.
- Show alerts assigned to me toggle - Toggle on to view alerts only assigned to you. Toggle off to view all alerts.
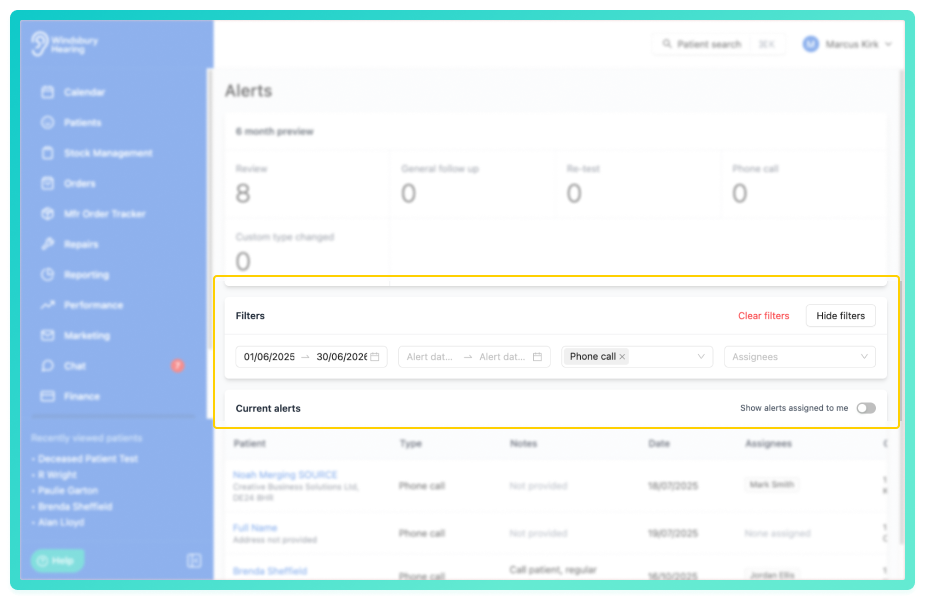
Multiple filters can be applied at once to narrow results.
Acknowledge an alert
When you've read an Alert and want to remove it from the list, you can Acknowledge it.
- Locate the Acknowledge text next to the relevant alert.
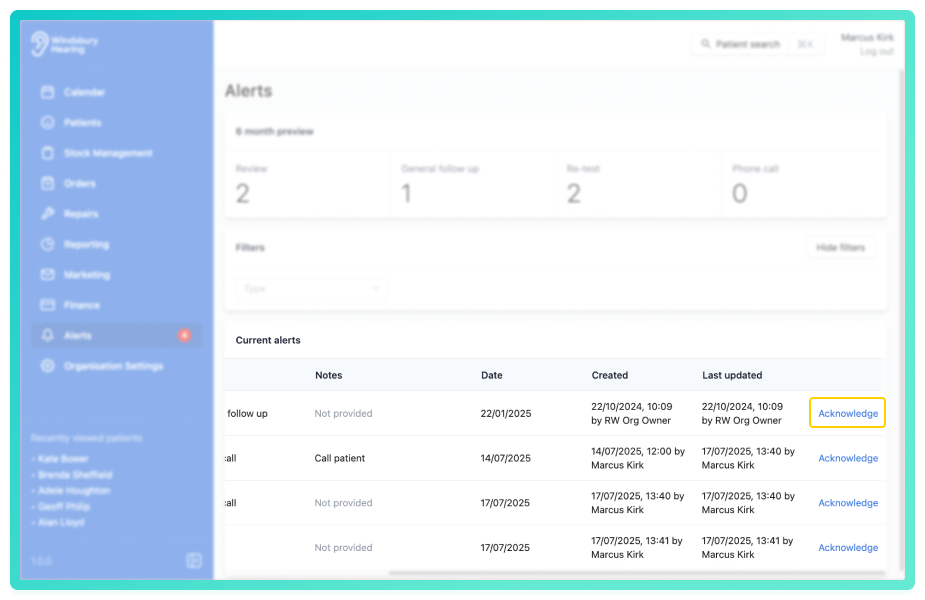
- Click Acknowledge. The Alert will be removed from the alerts list but will remain visible in the Patients dashboard as Acknowledged.
This keeps it clean, avoids unnecessary separation, and supports usability by covering all alert actions in one place.
Was this article helpful?
That’s Great!
Thank you for your feedback
Sorry! We couldn't be helpful
Thank you for your feedback
Feedback sent
We appreciate your effort and will try to fix the article