Groups allow your organisation to manage user permissions in a flexible way. You can create as many groups as needed, each with its own set of permissions tailored to specific roles or responsibilities within the organisation.
In this article we'll cover:
- what groups are and why they matter.
- how permissions are applied through groups.
- a practical example of group based permissions.
- how to get started with groups.
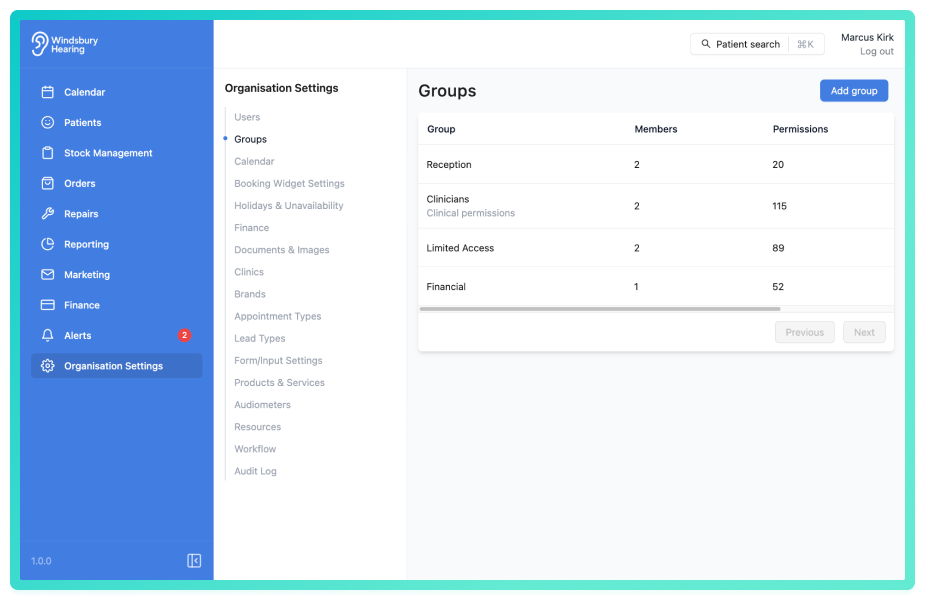
Why use Groups?
Groups simplify permission management by allowing you to assign access rights to multiple users at once, based on their role. This ensures consistency across your team and reduces manual setup for each user. Users can be members of multiple groups.
Hers's a visual breakdown of how different groups might be structured within your organisation:
| Group | Role or Function | Example Permissions |
|---|---|---|
| Clinicians | Staff involved in patient care | View/create.update patients, appointments, no delete |
| Front Desk Team | Book and manage appointments. Set schedules. | Calendar access, appointments, basic patient access |
| Administrator | Organisation management | Full access, including settings and users |
Example: Setting group permissions
Let's say Mark Smith is a clinician within your organisation. You want to give him:
- Full access to patient data, except the ability to delete a patient.
- Full access to stock management, including deleting stock.
Here's how you would achieve that using groups:
- Create a new group.
- Set the required group permissions for patient data and stock management.
- Add Mark to the group.
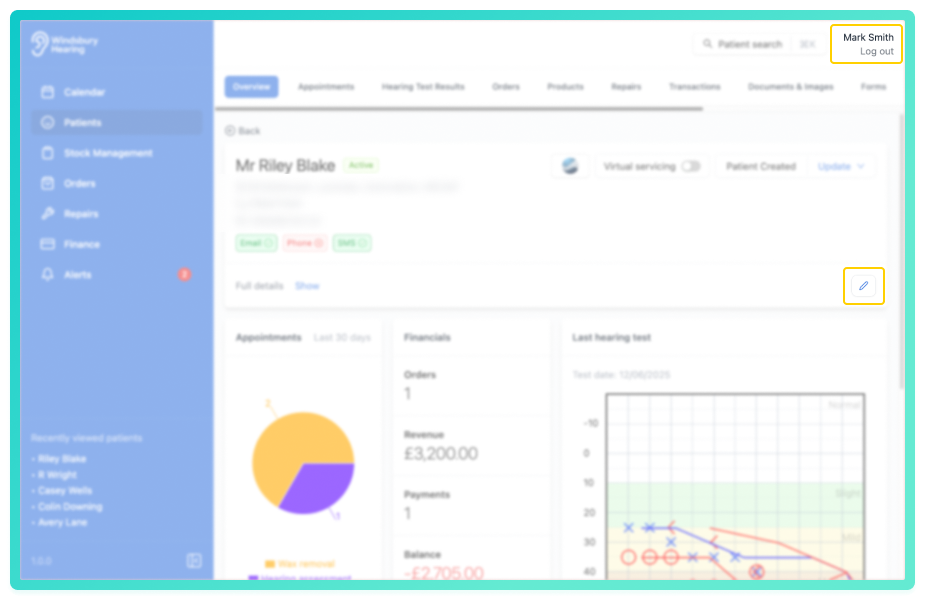
Because you didn't enable the permission to delete patients, Mark will be able to view, create, and update patient records. But not delete them.
For stock management, he has full permissions, including delete.
Notice Mark's interface does not have the Delete icon because he can't Delete patients.
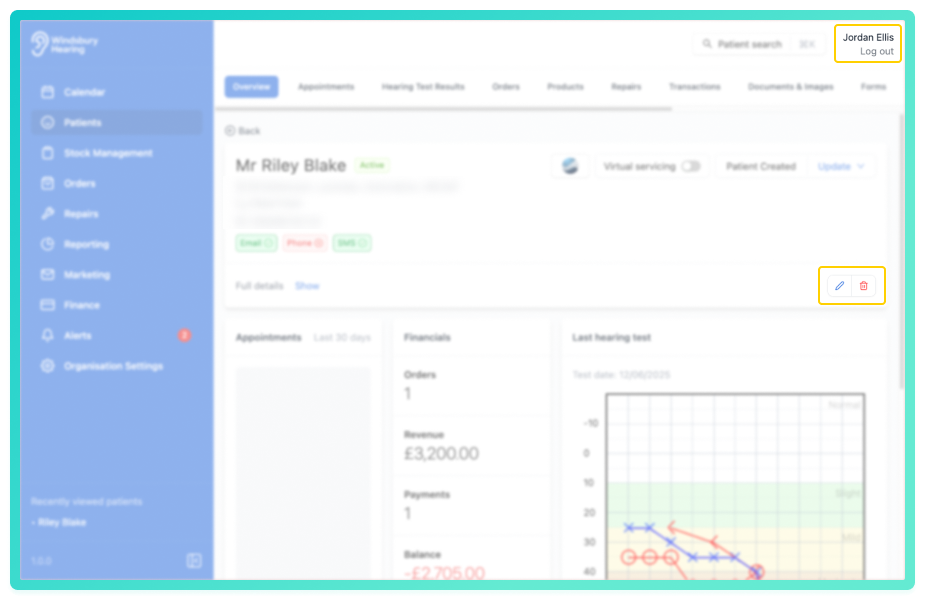
However, Jordan is in another group with delete permissions enabled and can Delete a patient so the Delete iconis visible in her interface.
We're covering just two parts of the HearLink system here, but the process is repeatable across all permissions.To begin setting up your own permission structure. Visit Add a group.
Was this article helpful?
That’s Great!
Thank you for your feedback
Sorry! We couldn't be helpful
Thank you for your feedback
Feedback sent
We appreciate your effort and will try to fix the article