When your organisation has set up hearing report templates, you choose one on the hearing test and complete the fields it asks for. HearLink produces the report as a PDF each time you save, laid out exactly as the template was designed. This article covers using a template on a hearing test. To build or change a template, see Manage Hearing Report Templates.
Only users with the correct permissions can create patient hearing tests. If you think you should have permission to perform such an action please contact the organisation owner.- The template you choose decides which fields appear on the hearing test, so pick it before you start filling anything in.
- The report is produced automatically every time the hearing test is saved. There is no separate generate step.
In this article we'll cover how to:
- create a hearing test and choose a template.
- complete a test that came from Noah.
- complete the report fields.
- add an image to the report.
- complete a table.
- check that your answers will fit.
- save the test and view the report.
- change the template on a test you have already saved.
Create a hearing test and choose a template
- Open the patient's record and find the Hearing tests section.
- Click Create hearing test.
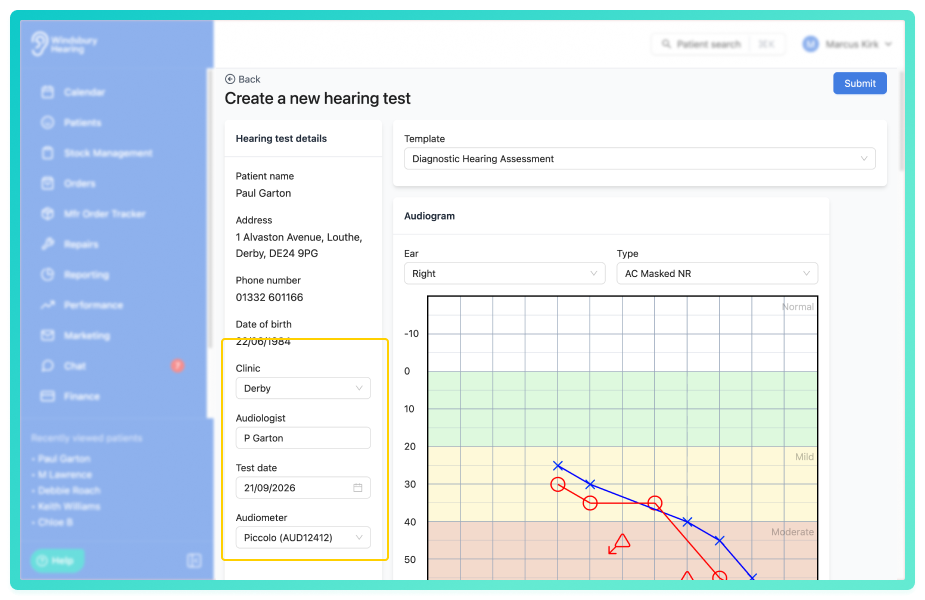
- Complete the test details: Clinic, Audiologist, Test date and Audiometer. All four are required.
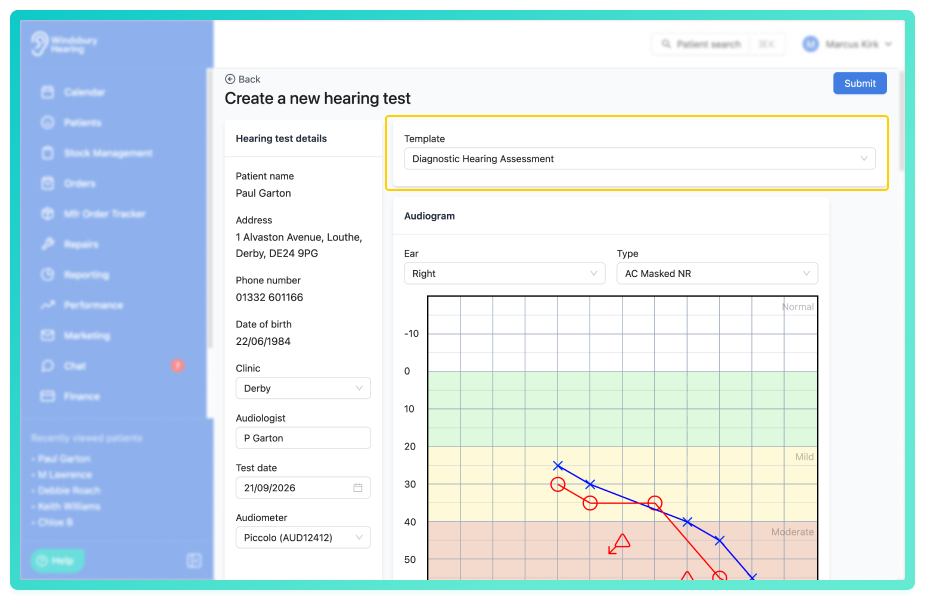
- Choose your Template. If your organisation has set a default template it is already selected for you, and you can change it.
- Plot the audiogram. Most tests reach HearLink from Noah with the audiogram already on them - see If the hearing test came from Noah below.
 Good to know: Choosing a template changes the hearing test form. Duration of loss, Occupation, Family deafness, Notes, Ear health and Hearing loss causes are replaced by the Report fields your template asks for. Choose No template (use default form) to go back to the standard hearing test and the standard report.
If the hearing test came from Noah
Most hearing tests arrive in HearLink from Noah rather than being typed in, and the audiogram comes with them. An imported test picks up your organisation's default template, so its report fields are waiting for you to complete.
- Open the patient's Hearing tests section. The imported test is already there, with its audiogram, date, clinic and audiometer.
- Click the Edit icon
 on the test.
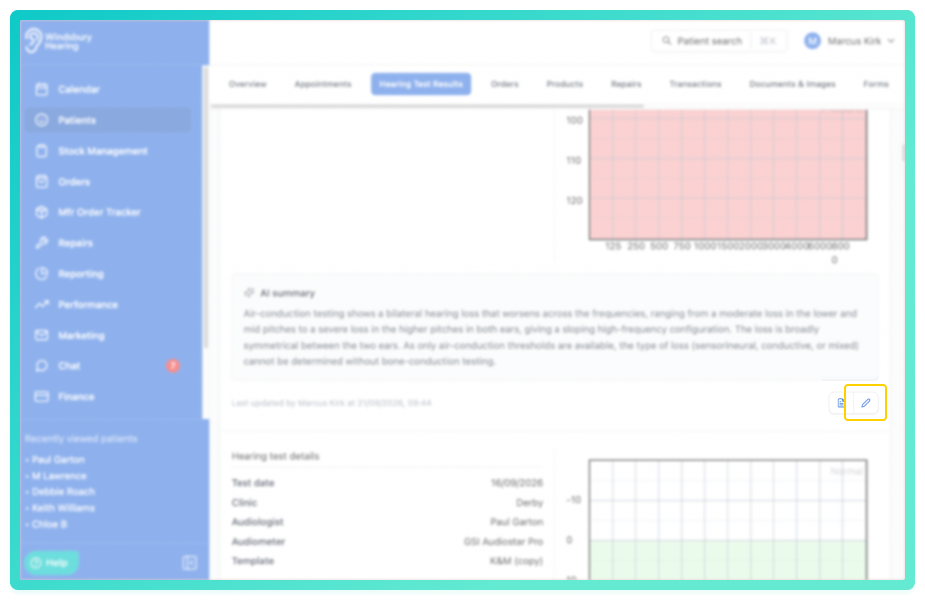
- The Template is already set to your organisation's default, and its Report fields are on the test. Change the template if this test needs a different one.
- If your organisation has not set a default template, the imported test arrives without one. Choose a template yourself, or leave it as No template (use default form) for the standard report.
- Complete the report fields and save. The report is produced using your template, with the audiogram that came from Noah.
 Reminder: An imported test has a report from the moment it arrives, laid out with your template and its audiogram, but with the report fields blank. It is produced again with your answers as soon as you save.
Complete the report fields
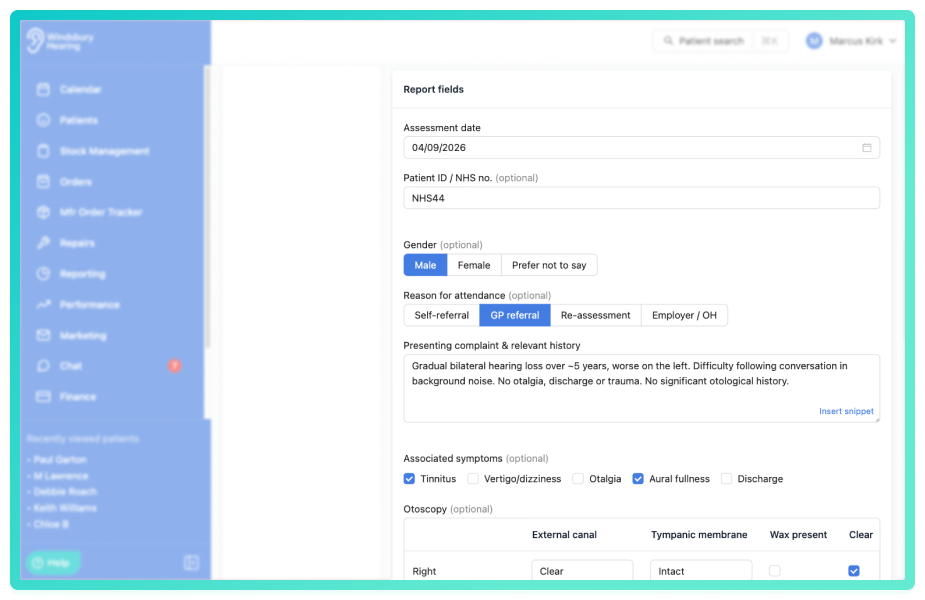
- Scroll to the Report fields section. These are the questions your organisation put on this template, and the answers print on the report.
- Fields marked as required must be completed before the hearing test can be saved.
- A field may ask for typed text, a number, a date, a signature, a single choice, several choices, or a table.
- Single and multiple choice answers print on the report as boxes with a tick against the ones you chose.
- For a signature, sign in the box on screen. The signature prints in the space the template sets aside for it.
Add an image to the report
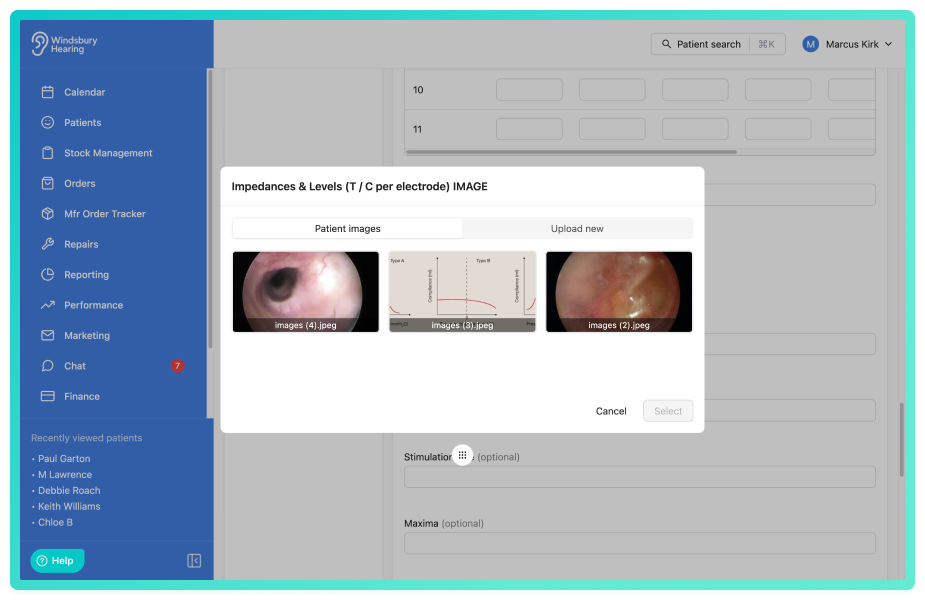
A template can include an image on the report, such as an otoscopy image.
- Click Select image on the image field.
- Use the Patient images tab to choose an image already held against the patient, or the Upload new tab to add one from your computer or device.
- If the patient has no images yet, the first tab shows No images found for this patient. Upload one instead.
- To swap an image you have already chosen, click Change image.
Complete a table
- A table field has a fixed set of columns and rows, set by whoever built the template. You fill in the cells.
- A cell asks for text, a number or a tick, depending on how the column was set up.
- Where a column is required, every row needs a value in it before the test can be saved.
- The column widths on screen match the widths on the report, so a narrow column on the form is a narrow column when it prints.
 Warning: Keep table answers short. Text that is too long for a cell is cut off when the report is produced, and you are not warned. If your answers do not fit, ask whoever manages your templates to widen the column.
Check that your answers will fit
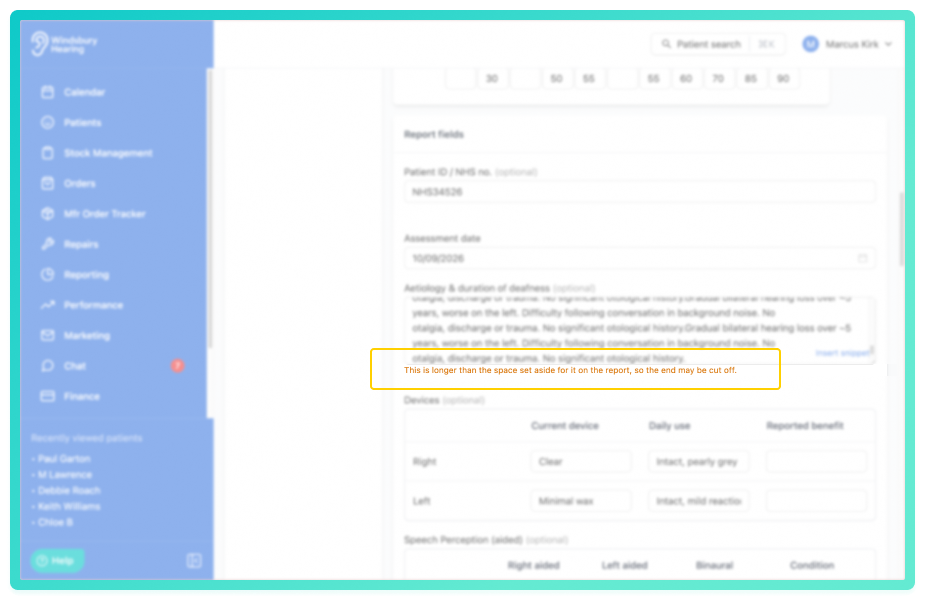
Each field has a set amount of space on the report. HearLink tells you while you type when an answer is going to be too long for it.
- A message appears under the field: This is longer than the space set aside for it on the report, so the end may be cut off.
- A long answer is made smaller so that more of it fits, down to a minimum size. Past that point the end of the answer is cut off and does not print, even though it is saved on the hearing test.
- If you see the message, shorten the answer, or check the report afterwards to make sure nothing important is missing.
- If a field is regularly too small for what you need to record, ask whoever manages your templates to give that field more room.
Save the test and view the report
- Click Submit to save the hearing test. The report is produced in the background, so give it a moment before opening it.
- Go back to the patient's Hearing tests section. The test shows its date, clinic, audiologist, audiometer and the Template it used.
- Click the View report action on the test. The report opens in a new browser tab, ready to print, save or send to the patient.
- Every time you edit and save the hearing test, the report is produced again with your changes.
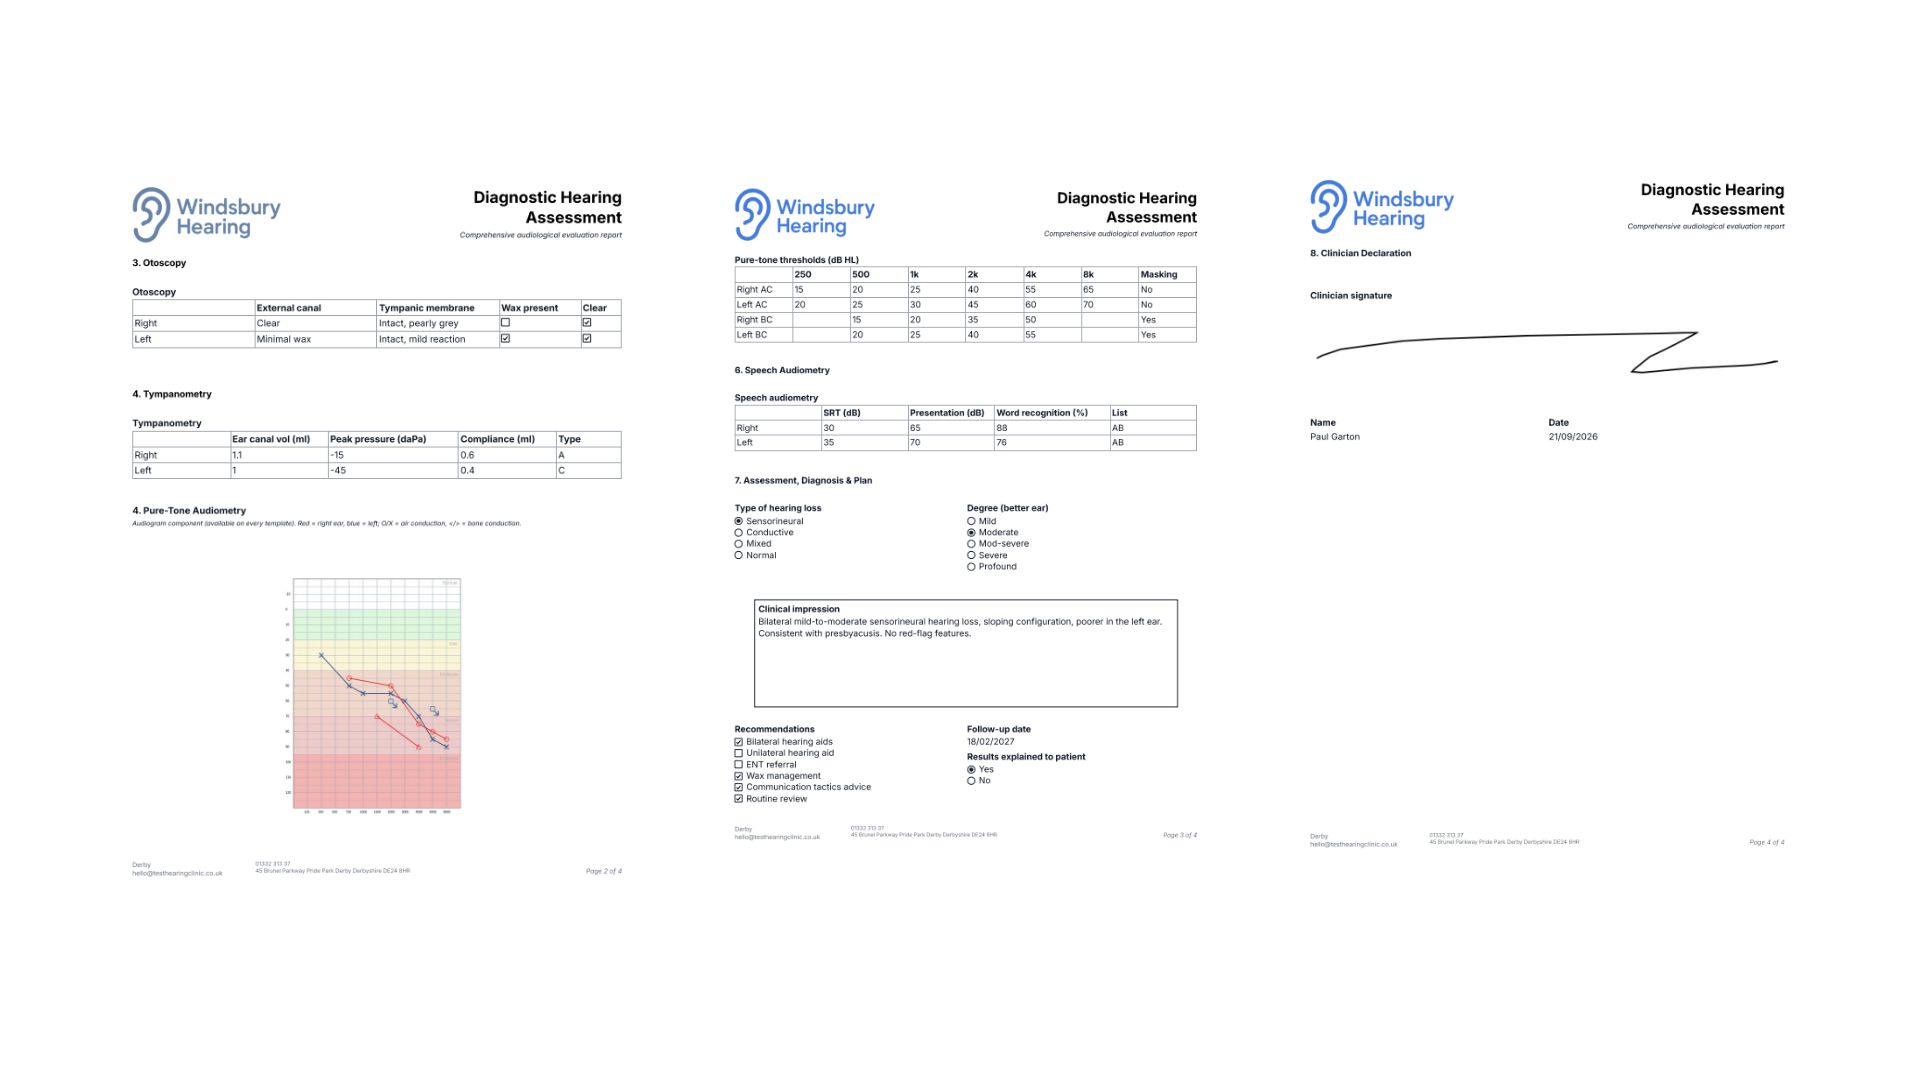
Reminder: The saved hearing test lists the test details, but not the answers you gave to the report fields. To read those again, open the report or click the Edit icon on the test.Change the template on a test you have already saved
- Open the patient's Hearing tests section and click the Edit icon on the test.
- Choose a different Template. HearLink warns you as soon as you do.
- Complete the report fields the new template asks for, then save. The report is produced again using the new layout.
Warning: Changing the template replaces everything recorded against the old one. The answers from the previous template are lost as soon as you save, and cannot be recovered. Open the existing report first if you need a copy of what was recorded.Was this article helpful?
That’s Great!
Thank you for your feedback
Sorry! We couldn't be helpful
Thank you for your feedback
Feedback sent
We appreciate your effort and will try to fix the article