An organisation can add and verify their own domain. Once set, every email communication that is sent in HearLink will be from your own domain, such as hearlink.co.uk. This improves deliverability, brand recognition and communication.
Organisations can manage multiple domains, allowing different senders addresses for different clinics where required.
These emails are still sent from within HearLink. While they use your authenticated domain as the sender, they are not sent through your external email provider's mailbox. Because of this, the message will not appear in the "Sent" folder of your email provider (such as Outlook or Gmail).In this article we'll cover how to:
- add a new email domain.
- generate and install DNS records.
- verify the domain.
- remove a domain.
- understand how the domain is used once verified.
- troubleshoot.
Only users with the correct permissions can add domain authentication. If you think you should have permission to perform such an action please contact the organisation owner.Add a new email domain
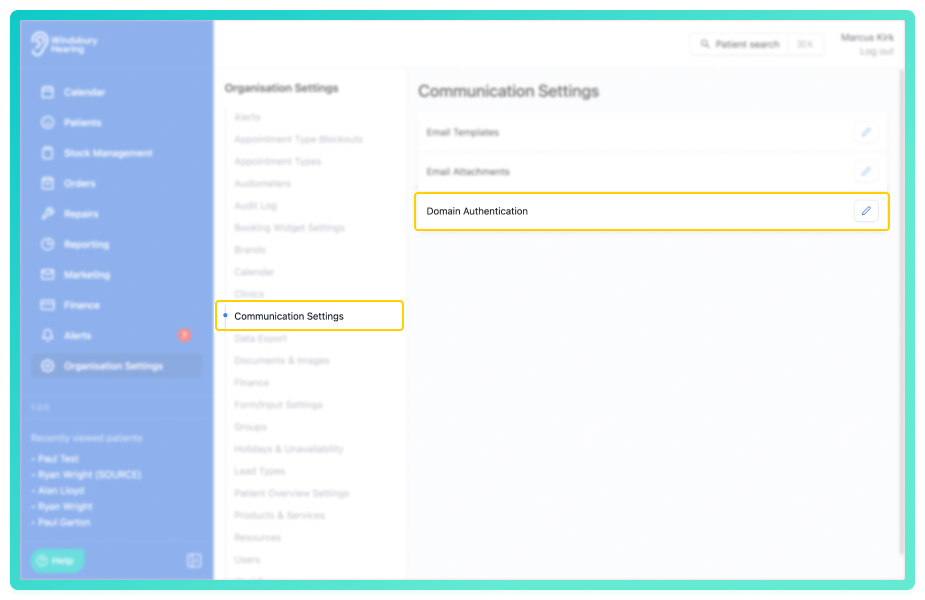
- Navigate to Organisation settings.
- Locate and click the Communication Settings section of the settings.
- Click the Edit icon
 next to Domain Authentication.
- Click Add Domain.

- Add a Domain (the part of the email address that comes after the @).

- Click Submit.
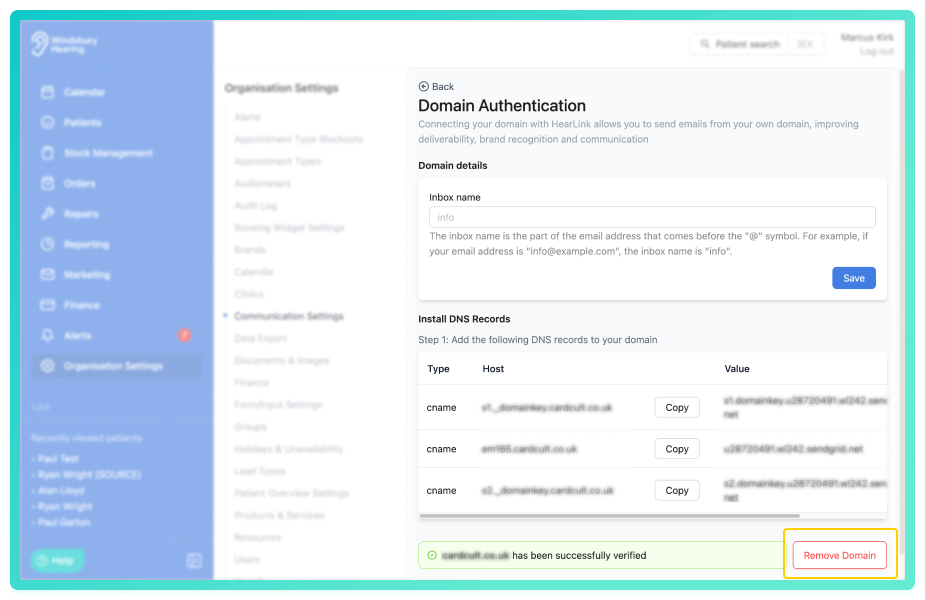
Once submitted. The domain will be added to the list of domains with a Pending verification.

Install DNS records
Once you have added a new domain email, the system with generate DNS records to be installed to your domain (cname records).
 Important: DNS configuration should be done by someone with access and experience managing your organisations's domain, such as your IT provider, website administrator, or whoever controls your email hosting. Most users will not have the access or required permissions to update DNS.
Common providers include GoDaddy, Microsoft 365, Reg 123 and Google workspace.

Once the DNS records have been added, return to HearLink and click Verify.
Verify the domain
After the DNS records propagate (this can take anywhere from a few minutes to 24 hours), HearLink will confirm that the domain is successfully verified.
A domain is considered verified when:
- all required DNS records have been found.
- the domain passes authentication checks.
Once verified, your domain will show as successfully verified.

Remove a domain
A verified or unverified domain can be removed at any time.
If the domain is in use, you will not be able to remove the domain until you remove the Sender Configurations- Click Remove Domain.
- You will see a warning message.
- Click Delete to remove the domain.
Understanding and using the verified domain
Once the domain is active:
- You can set up Sender Configuration, this is where you can add the inbox name (or multiple) to the domain.
- All emails sent from HearLink will use your chosen sender address (e.g. @yourclinic.co.uk).
- templates, confirmations, reminders and ad hoc emails will automatically use the verified domain.
- improved deliverability reduces the likelihood of messages being marked as spam.
- your brand identity remains consistent across all communications.
Once verified, your domain will show as successfully verified.
Troubleshooting
Domain not verifying?
This is usually caused by:
- DNS records missing or entered incorrectly.
- DNS changes still propagating.
- Records added to the wrong DNS zone.
- A provider that needs extra time to update.
Check the guidance with your IT provider or DNS host and try again later.
Was this article helpful?
That’s Great!
Thank you for your feedback
Sorry! We couldn't be helpful
Thank you for your feedback
Feedback sent
We appreciate your effort and will try to fix the article